# Metamask
Connect your Metamask wallet with Ethermint on a localnet mode.
# Start node and REST server
Start the Ethermint node using your terminal:
You can also start a node from scratch by running ./init.sh from the Ethermint repository directory. This will generate a key called mykey that you can use on the next step.
In another tab start the REST server. Here replace mykey with the name of the key that you want to use and set the chain-id the chain identifier of your application.
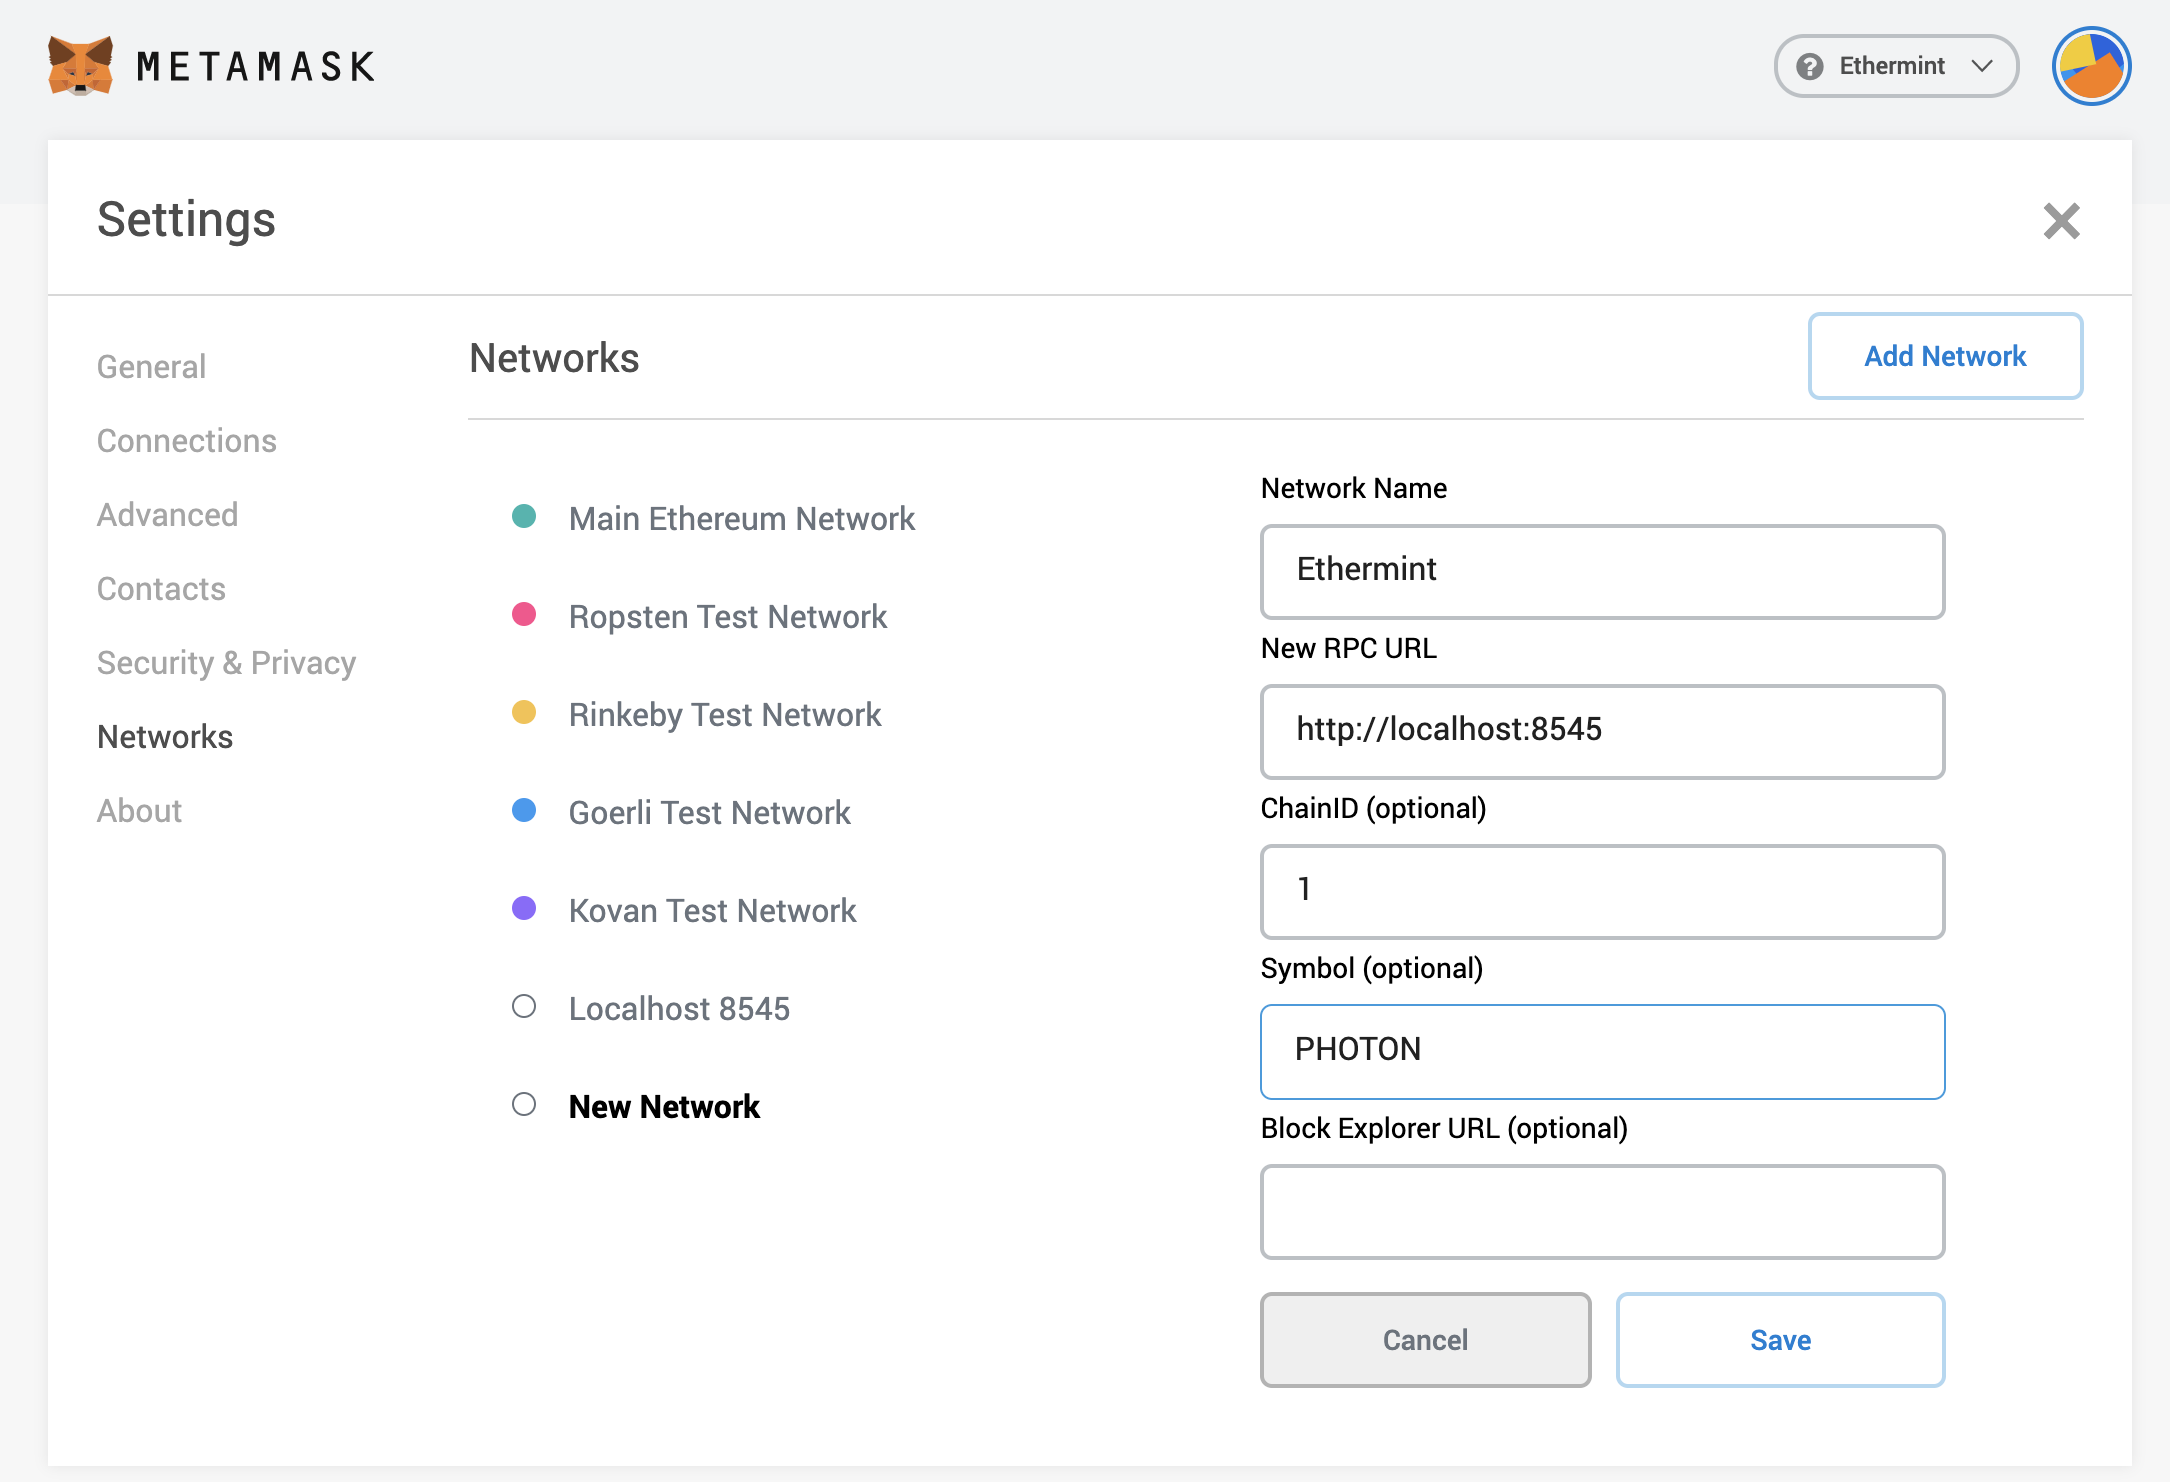
# Adding a custom Network for Ethermint
One of the main limitations of using the default Localhost 8545 network is that the tokens will be represented as ETH.
Open the Metamask extension on your browser, you may have to log in to your Metamask account if you
are not already. Then click the top right circle and go to Settings > Networks. Press the Add Network button and fill the form as shown below with your application ChainID.
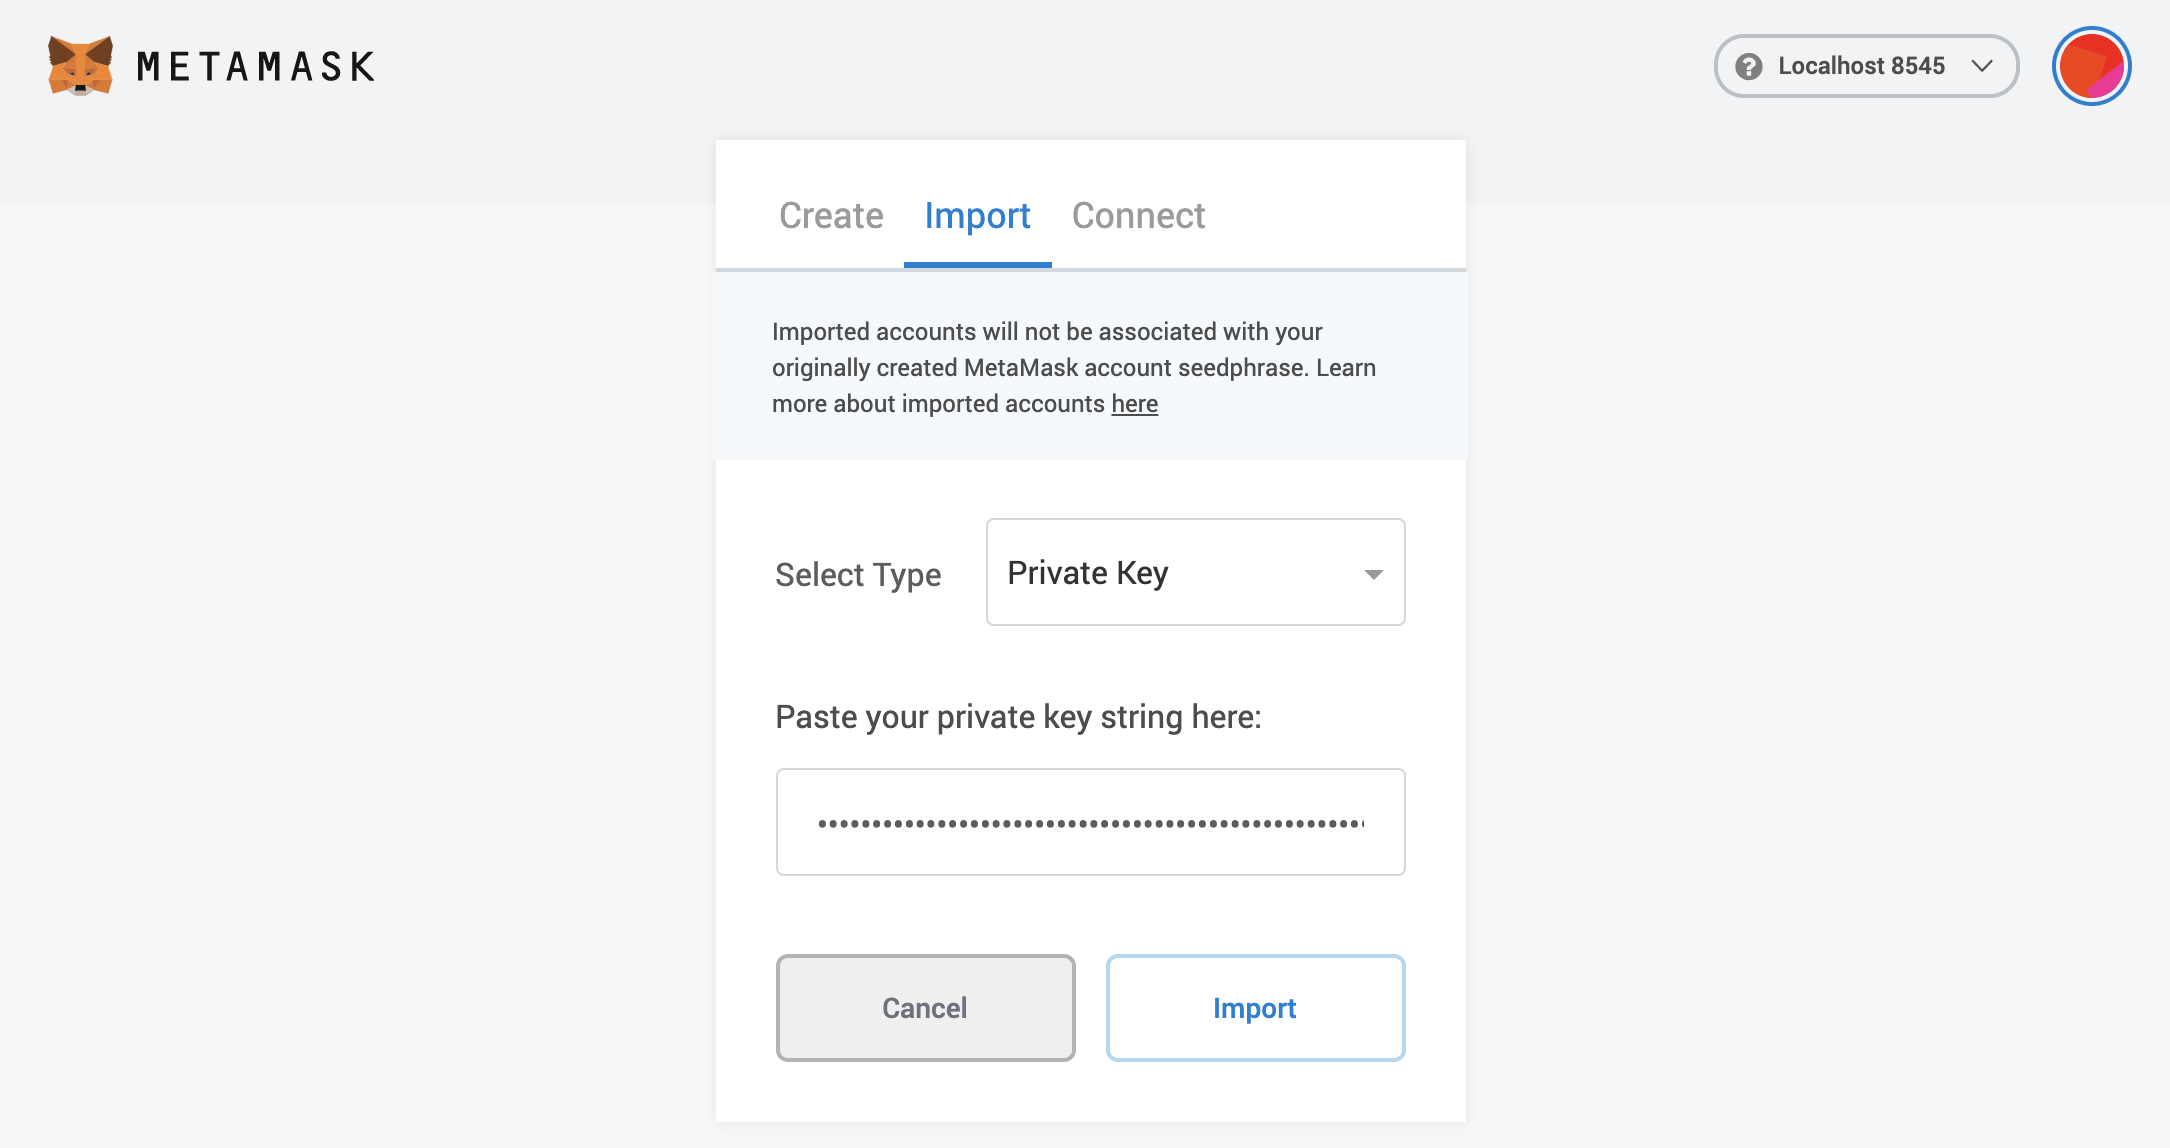
# Import Account to Metamask
Then close the settings, and go to My Accounts (top right circle) and select Import Account. You should see and image like the following one:
Now you can export your private key from the terminal using the following command. Again, make sure
to replace mykey with the name of the key that you want to export:
Go back to the browser and select the Private Key option. Then paste the private key exported from
the unsafe-export-eth-key command.
Your account balance should show up as 1 APHOTON and do transfers as usual.
If it takes some time to load the balance of the account, change the network to Main Ethereum Network (or any other than Localhost 8545 or Ethermint) and then switch back to Ethermint.
# Downloading State
to see metamask logs, go to top right circle -> settings -> advanced -> download state logs. if you search through the json file for the account address you'll find the tx history
# Known issues
Currently, it's not possible to add custom tokens (even for APhotons) unless you deploy a token contract (eg: ERC20).